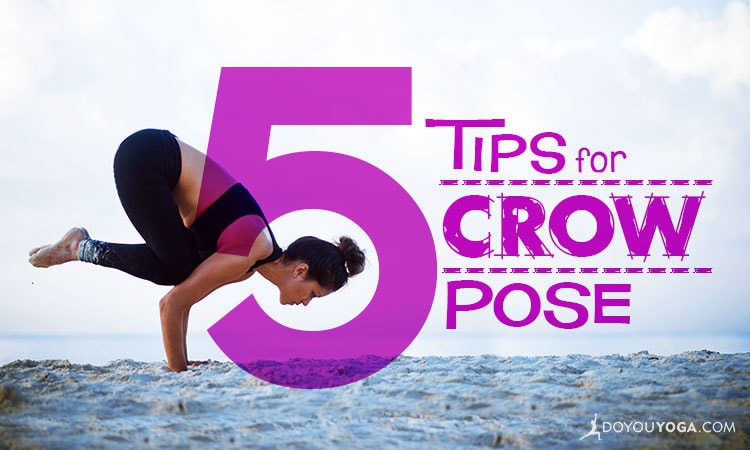
For a lot of yogis, Crow is THE pose they want to master the most. It challenges our strength, flexibility, and coordination. And because we don’t want to face-plant, it can bring our focus directly into the present moment in a matter of split seconds.
Crow pose can be really frustrating when we try and try over again but don’t seem to get any lift-off. I had a frustrating relationship with Crow for a while. This led me to become more obsessed with the act of flying rather than actually embodying the pose, therefore missing the whole yoga aspect.
My challenges in this pose led me to explore some of the key alignment principles in depth. I discovered a few significant cues that seemed to make sense and made the pose seem a whole lot easier. So I thought I’d share them with you.
Cautions: Crow pose is contraindicative for some conditions, and not recommended during pregnancy, or if you have Carpal Tunnel or wrist injury.
1. Set up the foundation.
The hands are essentially the foundation of Crow pose. If you have them too far apart or too close together, you’re building upon something that’s potentially quite unstable.
Hands should be shoulder distance apart, with the weight distributed evenly across the whole palm, including the five finger pads. While it’s common to dump most of the weight into the heel of the hand, doing so can lead to unhappy wrists.
By setting up a decent foundation, you can start to build a more stable pose from the base up.
2. Get the knees as high up the arms as possible.
You want to get the body low so you can glue your knees as high up your upper arms as possible. If you’re tight in the hips, you’ll possibly find it challenging to get down low enough for the knee or upper arm connection.
If this is you, you can try using a block under your feet. The extra height the block gives you can help the knees reach higher up the arms. It also helps you wave your tail feather up in the air, which you need to do once the knees and arms are connected.
I like to start with my feet together (obviously knees wide), though some people find it easier to start with their feet wider. If you’re a wide-feet-Crow yogi, then you’ll need a couple of blocks.
3. Draw in first, then lift up.
This was an important cue for me. I was so fixated on wanting to lift off that I wasn’t recruiting the muscles I needed to actually get up there.
So the knees are pressing in to the upper arms. The inner thighs are active and drawing intowards each other. The elbows are drawing in, not flapping out to the side. The triceps are firming in to the midline.
The act of drawing everything in should naturally encourage an upward lift.
4. Shift the weight forward.
This can be the scary part for a lot of people. If the mind is fearful of falling, it will do whatever it can to hold you back. So firstly, set the intention with your eyes by taking your gaze out in front of your hands. Then reinforce the message that you’ve got this.
Remember, if you’re scared of falling forward, then put a couple of cushions or blankets down in front to make a soft landing pad, which can help relax the mind around the idea of face planting. Another thing—keep elbows over heel of the hand. This goes hand in hand with shifting the weight forward.
For me, it all clicked into place when I focused on my elbows. I’d been practicing with my elbows flapping out to the side like chicken wings. This was creating instability, and therefore standing in my way of lifting up.
Once I realised that I needed to bring the elbows in and forward over the heel of the hand (like in Chaturanga or Four-Limbed Staff Pose), I felt stronger and way more solid in the pose.
5. Upper back is rounded, not flat.
The upper back should be rounded, which ignites some really important muscles that help with balance and poise. This point can be the difference between you flying for a few seconds, and holding the pose for longer.
To round through the upper back, press your hands in to the mat as though you’re pushing the mat away from you. I like to imagine I’m puffing up a little in the centre of the upper back.
As well as physical alignment cues, it’s really important to 1) Breathe, and 2) Get the mind working for you. So let go of any un-serving thoughts like “I can’t” or “I’m scared,” and instead visualise yourself gracefully and effortlessly holding the pose. You CAN do it, and you will!