Remember high school math class and all the laws of triangles? Me neither. But while Extended Triangle pose (Utthita Trikonasana) may not be as mathematically precise, the physical alignment is just as exacting. When all the elements come together — stretch and strength, rooting and expansion — the result is a beautifully expressive pose that balances the grounding through our foundation with the lift of our peak, and reconnects body, breath and mind.
Benefits Of Extended Triangle Pose
Extended Triangle pose stretches the legs, groins, hips, shoulders, chest and spine, and strengthens the feet, ankles and legs. Practicing Extended Triangle pose can stimulate the abdominal organs, aiding with digestion, and may help to alleviate stress and anxiety.
Step-By-Step
- Begin standing at the top of your mat in Mountain pose (Tadasana). On an exhalation, step your left foot back about 3 to 4 feet (depending on the length of your legs and the level of openness in your hips and groins), placing it parallel to the back edge of your mat.
- Angle your left foot in slightly (approximately 15 to 20 degrees), and line up the heel of your right foot with the heel of your left foot. With straight legs, firm your thighs without locking into your knees, and root the mound of your right big toe into your mat to activate and lift the arch of your front foot.
- With an inhalation, extend your arms to shoulder height alongside your body, parallel to the floor. Reach out actively through the fingertips of both hands, palms facing down, and soften the tops of your shoulders.
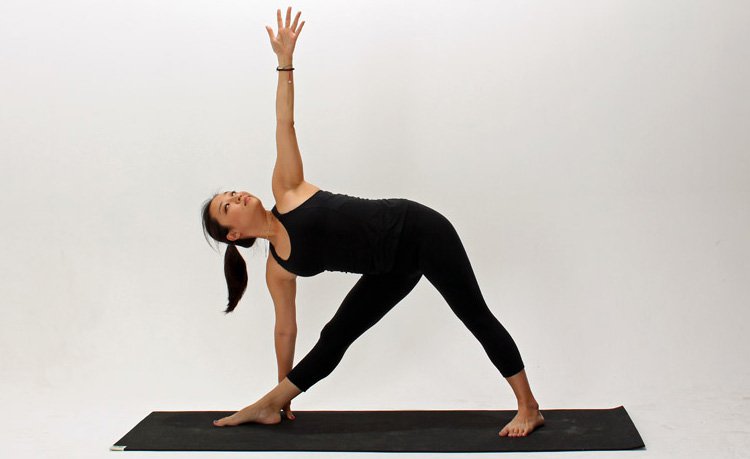
- Begin to extend your right hand forward and hinge at your right hip to bring your right hand down, keeping your front body and pelvis facing toward the left edge of your mat. If you have a block, place your right hand on a block just outside the pinky toe edge of your right foot — if a block isn’t available, place your right hand lightly on your right shin for support.
- Reach your left arm straight up toward the ceiling, firming your shoulderblades onto your back and broadening across your entire wingspan.
- Lengthen evenly through both sides of your torso, and press into the support under your right hand to grow taller through your left fingertips and broaden across your collarbones.
- Root down evenly through the four corners of both feet, paying particular attention to the outer edge of your back foot, which has a tendency to collapse inwards.
- Keep your head in a neutral position or send your gaze up toward your left hand if it feels comfortable for your neck.
- Remain in the pose for 5 full breaths. On an inhalation, send your gaze down and press firmly into the soles of both feet to bring yourself back upright to stand, and step forward to the top of your mat. Reverse your feet and repeat on the other side.
Tips
- If balance feels difficult, or the pose feels too deep, decrease the distance between your feet slightly and/or take a slightly wider stance with your feet to create a greater sense of stability in your foundation.
- If the hamstrings are particularly tight, then take a slight bend in your front knee as necessary in order to maintain a sense of length along the spine and side body.
- For an added challenge, take your right hand down to the outside edge of your right foot (while maintaining an even sense of length along both sides of your body), or take both arms alongside your ears to activate your core strength in this pose.