Eagle pose (Garudasana) is named after Garuda, the mythical “king of the birds”. While Garuda is very large — larger than life, in fact — the pose is quite compressed, reminding us that our physical size isn’t necessarily correlated with our power or our potential. Indeed, the smaller we can make ourselves in the pose, wrapping our limbs tightly around one another, the more challenging and potent it becomes.
Benefits Of Eagle Pose
Eagle pose helps to compress and bring fresh blood to the limbs and joints, creating a detoxifying and energizing effect in the body. The pose also strengthens the feet, ankles, calves and thighs, and stretches the shoulders, arms and upper back. Practicing Eagle pose develops focus and concentration, improves balance and stability, and can also stimulate metabolism.
Eagle Pose Step-By-Step
- Begin standing in Mountain pose (Tadasana), with the feet separated hip-distance apart and parallel. Root down firmly through all four corners of the feet — big toe mound, pinky toe mound, and the two outer edges of the heels.
- Shift your weight into the sole of your left foot, take a slight bend in both knees, and inhale to pick your right foot up off the mat and cross your right thigh over your left.
- Point your right toes down and move towards hooking the right foot around the back of the left calf while maintaining the balance in the left standing leg. As you exhale, take a deeper bend in the knees and sink the hips a little lower.
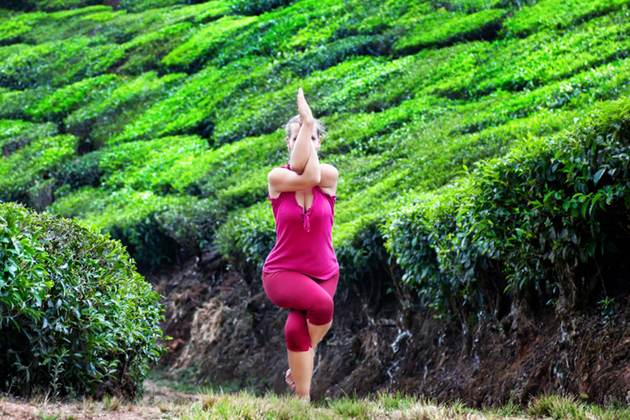
- Extend your arms out in front of you, cross your left arm on top of your right arm and bend your elbows, bringing your palms together to touch.
- Lift your elbows, raise your forearms perpendicular to the floor and draw your shoulderblades down your back.
- Begin to square off your hips and shoulders, drawing the left hip and the right shoulder back, and stack your shoulders over your hips, keeping the low belly drawn in and the core engaged. Keep your eyes focused on one fixed point to maintain steady and balanced.
- Remain in the pose for 5 full breaths, then gently unwind the limbs and come back to stand in Mountain pose. When ready, repeat on the other side.
Tips
- Taking a deeper bend in the knees can help create more space to wrap the toes around the back of the calf and move more fully into the pose. If the right foot doesn’t wrap around the left calf, simply keep the legs crossed or keep the right big toe down on the floor if balance feels difficult.
- If the palms don’t come together to touch, take a hold of opposite shoulders instead, or keep the backs of the hands together.
- To deepen your expression of the pose, try folding forward slightly, drawing your elbows towards your knees and compressing the entire body.