Krounchasana takes its name from krouncha, the Sanskrit word for “heron”. In Light on Yoga, B.K.S. Iynegar explains that the “raised leg resembles the oustretched neck and head of a heron…hence the name.”
Although Heron Pose is classified as a forward fold, it is actually more difficult than traditional forward bending poses, as the leg must be lifted against the force of gravity to meet the body, rather than folding the torso toward the legs.
Regardless of whether or not your pose actually looks anything like the long-legged heron, embodying the graceful quality of the bird and respecting your human limits is what matters most.
Benefits of Heron Pose:
Heron Pose stretches the hamstrings and glutes of the extended leg, and lengthens the quadriceps of the bent leg. The pose also stimulates the abdominal organs, strengthens the psoas and spinal extensors, and can be therapeutic for flat feet and flatulence.
Heron Pose Step-By-Step:
- Begin seated in Staff Pose (Dandasana), with both legs extended straight out in front of you, spine long.
- Bend your right knee into Hero pose (Virasana), so that the right shin is resting on the floor and the heel of the right foot is beside the right hip. Ensure that the toes of your right foot are pointing straight back and that your thighs are parallel to one another (i.e. the right knee isn’t bowing out to the side).
- Bend your left knee so that the sole of your left foot rests on the floor just in front of the left sit bone.
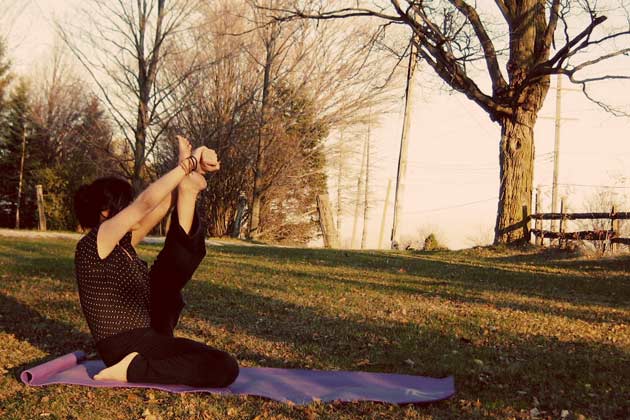
- Take a hold of the outer edges of your left foot with both hands, and begin to extend the leg as straight as possible. Lean back slightly, keeping your gaze on your left foot, and keep the core strong and engaged.
- On an inhale, raise the leg as high as you comfortably can. Focus on keeping your spine long and your chest lifted, rather than rounding the spine and collapsing through the chest in an effort to bring the lifted shin closer toward your face. With every breath, grow taller along the spine and lift the ribcage higher.
- Remain in the pose for 3 to 5 full breaths. On an exhale, gently bend and lower the left leg and return to Dandasana. When you feel ready, repeat on the other side.
Tips:
- Feel free to use a strap or belt around the ball of the raised foot if the hamstring feels tight. Remember, the key action of the pose is to keep the spine long and the chest lifted, so using a strap to create length and mitigate any tension in the legs will help maintain the structural integrity of the pose.
- If you find that the sitting bone of the raised leg lifts up off the ground, tuck a folded blanket or a foam block underneath the sit bone to keep both sides as even as possible.
- Practicing Krounchasana with the back against the wall is also a great option for beginners to the pose, particularly those with the tendency to round the spine. Bring your sit bones to the edge of the wall and press your spine along the wall to remind you to keep the back tall and lifted.
- For more of a challenge, the full expression of the pose is to bring the chin to touch the shin and your lifted leg as close to your torso as possible. Advanced practitioners can also clasp the wrist rather than holding on to the foot.