It’s got to be the most recognised of all yoga poses, right? Adho Mukha Svanasana, or Downward-Facing Dog appears in most styles of yoga as either a strengthening pose, a transition pose, or a resting pose. Getting the alignment right is not only important for your anatomy, it also helps you truly love this pose.
I really do understand those of you who have an aversion to the inverted V. I’d groan internally whenever the teacher asked us to “rest” in Downward Dog, because it honestly felt nothing like a rest. Honestly, this pose was my nemesis when I first started practicing yoga. If you’re practicing yoga for the first time, I recommend signing-up to the 30 Day Yoga Challenge. A regular practice really helped me find my flow and this challenge will help you get into a good routine and of course, help you practice your downward dog so you get better and better!
How I Down Dog—Then and Now
A form of scoliosis combined with an extremely tight psoas and hamstrings mean that I often have a pronounced bulge in my lower thoracic spine in Downward Dog, particularly in the morning before I’m warmed up.
At the start, I was fixated with placing my heels on the floor, feeling as though that was the measuring stick. But that only served to compress my spine and create a whole lot of discomfort.
Thankfully, right before I went through teacher training a few years later, I met a yoga teacher who was pretty fastidious about how we got down in our Dogs.
By focusing on and emphasising some not-so-obvious but very crucial alignment cues, this pose for me transformed from Adho Mukha Svanasana, the thorn in my side, to Aaaaaaaaaadho Mukha Svanasana—the big sigh of relief.
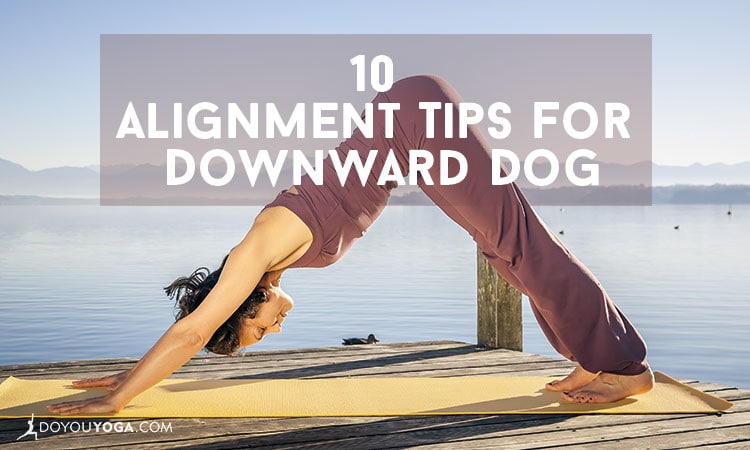
So without further ado, here are 10 alignment tips to improve your Downward Dog that have transformed the pose for me and will hopefully do the same for you! Woof.
1. Hands should be shoulder distance apart.
Spread your fingers wide and align your wrist crease to the front of the mat. Use the whole surface area of your hand including your five finger pads and emphasise pressing the index and thumb pads into the mat.
2. Feet are sit-bone or hip distance apart.
Glance back and check your feet. If you can see your heels, try turning them out slightly so you can’t see them anymore.
3. Activate your arms.
As you press down through your wrists, feel the energy draw back up to activate your arms. Feel as though your thumbs want to draw in magnetically towards each other, which will slightly rotate your forearms inwards, towards each other.
4. Upper arms externally rotate.
I know it sounds tricky to internally rotate the forearms and externally rotate the upper arms, but anatomically, the arms are up for it. It’s a fairly subtle action and I like to imagine I’m hiding my underarms from the person on the next mat when doing it.
This will also keep your shoulders away from your ears, giving more space in the neck.
5. Neck and head continue along the same line as the spine.
It’s super important to be aware of where your head and neck are in space in any yoga pose, and this one is no exception. The neck is part of the spine, so it should follow the same natural line.
In a person with text book alignment, the head will be between the upper arms—but of course, exact placement of the neck will depend on your specific anatomy. The key thing to be mindful of is that you’re neither letting the head just ‘hang,’ nor crunching the neck too far up.
6. Firm shoulder blades and broaden across the upper back.
Loads of yogis scrunch up through the tops of the shoulders and around the neck in this pose, which can create even more tension and make it really uncomfortable.
By firming the shoulder blades and feeling them draw down towards the tailbone and broadening across the upper back, you can provide space as well as stability in your pose.
7. Engage the lower belly by drawing the navel in towards the spine.
A firm core is key and can help take some weight off from the shoulders and wrists, and back into the legs. Draw the lower ribs in and keep this core activation going throughout the pose.
8. Bend knees a little (or a lot) and send the sit-bones and tailbone up and back.
 Credit: Anna Coventry
Feel the difference this makes in your spine. If you have tight hamstrings, for the sake of your back you are far better to practice this pose with bent knees rather than force the heels down and compromise length in the spine.
Let your focus be spine first, heels down second (check out the photos above to see the comparison).
9. Inner thighs rotate inwards as you firm the outer thighs.
Do this, and notice how much easier it becomes to lift the sit bones up and back.
10. Straighten legs without changing the shape in the spine or pelvis.
Once you’ve reached this point, you can start to lengthen the heels back.
Perhaps they reach the floor, perhaps they don’t. One of the great benefits of this pose is lengthening out through the legs, but I find that by prioritising the heels down last, both my students and I enjoy a much better experience in our spine, which should always take priority.
When the muscles in the backs of the legs are ready to lengthen, they’ll lengthen. Be patient and embrace your point in the journey.
Guys, these are general tips, which means they don’t take into account any specific injuries or conditions. As an example, if you have a wrist injury, you may need to modify to the forearms (Dolphin Pose) or try this pose against a wall.
If you do have any specific conditions, please ask your yoga teacher in person about modifications suitable for your totally unique and awesome self.
So what do you think…do you like, loathe, or LOVE this pose?