Going upside down on your hands can be slightly intimidating, but everyone’s got to start somewhere. Enter the L-Pose Handstand.
The perfect introduction to Handstand (especially for students who aren’t quite ready to kick up to the wall), the L-Pose allows you to become comfortable going upside down with weight on your hands in a more controlled manner.
Plus, it’s a fantastic strength builder and shoulder opener for yogis of all levels, and a great tool for teachers.
If you feel strong and comfortable with straight arms in Downward Facing Dog and are ready to try going upside down, below is a step-by-step guide to L-Pose at the wall.
Step 1
 Sit on your mat with your back against the wall, and with your legs straight out in front of you pressing out through your heels. Reach your arms straight over head with the backs of your hands pressing into the wall.
Notice that you’re in the shape of an “L” with a 90-degree bend at your waist. Now imagine inverting your shape — placing your palms where your heels are on the mat and your heels pressing into the wall where the backs of your hands are, making the same “L” shape.
Step 2
 Using a block or any object lying around, mark where your heels are on the mat, and come onto all fours with your hands in line with your marker, knees under hips and the soles of your feet pressing at the wall.
Spreading your fingers, press down through the pads of your thumbs and index fingers and straighten your arms. Draw your shoulder blades firmly onto your upper back and broaden your collarbones.
Step 3
 Tuck your toes under on the floor and straighten your legs, coming into a shortened version of Down Dog at the wall. (You’re going to feel like you’re way too close to the wall, you’re not – leave your hands in line with your marker.)
Step 4
 Continue to press the inner edges of your palms down into the mat and your arms straight as you take one foot up the wall with your toes curled under at about the height of your hips.
Step 5
 Begin to straighten the raised leg, pressing the sole of your foot into the wall, and sending your hips over your shoulders as you bring the second leg up to join the first.
Here’s where some fear tends to creep in. Most students are leery of sending their hips over their shoulders, and will often walk their feet higher up the wall to avoid the 90-degree bend. Or they will sometimes walk their hands further away from the wall, making it impossible to come into the shape of an L.
If that’s you, simply walk your feet back down to where you can put your soles flat into the wall and your legs parallel to the floor.
Step 6
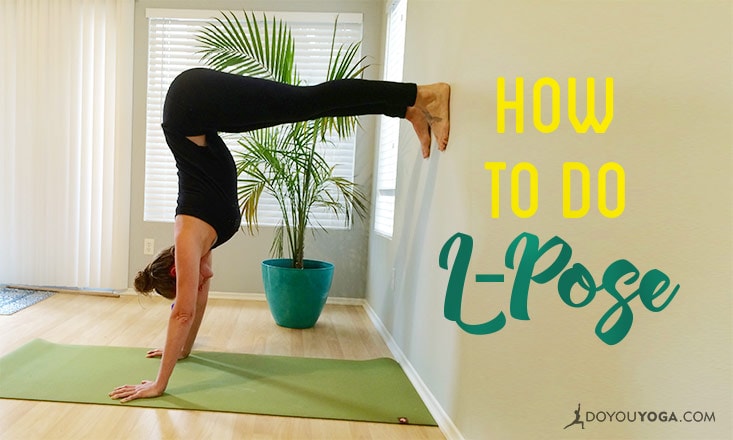
 With your hands, shoulders, and hips stacked, press the soles of both feet firmly into the wall and straighten both legs.
Now you’re in L-Pose!
Did you try it? Does L-Pose Handstand seem more approachable than Handstand? Let us know in the comments below!