After having just completed my Restorative Yoga Teacher Training this past weekend, it would be remiss for me not to focus my attention this week on one of my favourite restorative yoga poses — Legs-Up-the-Wall (Viparita Karani). There is something special about restorative poses such as Legs-Up-the-Wall that make them so readily accessible yet so incredible in their positive effects. After a long day, there is no comparison to lighting a candle, listening to some soft music, and putting your legs up the wall to bring balance back into your body. Treat yourself to this delicious pose — you deserve it!
Benefits Of Legs-Up-the-Wall Pose
Legs-Up-the-Wall pose offers myriad benefits, including reviving tired legs, regulating blood pressure, refreshing the heart and lungs, and restoring the parasympathetic nervous system. Therapeutically, the pose can provide relief from headaches, digestive problems, and menstrual cramps. In addition, Legs-Up-the-Wall is a wonderful antidote for stress, anxiety, and illness, and can bring the body back to its own innate capacity for rest, relaxation, and self-healing.
Legs-Up-the-Wall Pose Step-By-Step
- Place a bolster or two thickly folded blankets lengthwise along a wall, approximately three or four inches away from the edge where the floor meets the wall (the idea here is to create some elevation for the hips while supporting the pelvis and low back as the body softens into the pose).
- Facing away from the wall, come to hands and knees on the right side of your bolster or blankets, with your shins parallel to the short edge of your support, and your toes touching the wall.
- Thread your left arm through the gap between your right arm and your right leg, palm facing up, and lightly roll onto your left side, allowing your hips to pivot and come down onto your support, and your legs to sweep up the wall. Note that the sit bones and the backs of the legs don’t necessarily need to be making full contact with the wall here; there should simply be a sensation of soft support.
- Release the expectation that your immediate experience of the pose should be comfortable, and instead allow yourself the time to make whatever adjustments you need to make in order to find a physical expression of the pose that feels appropriate for your body — whether that means adjusting the distance between the bolster and the wall, shifting the hips, taking a slight bend in the knees, or placing a folded blanket or towel underneath the head or neck to maintain the natural curve of the cervical spine.
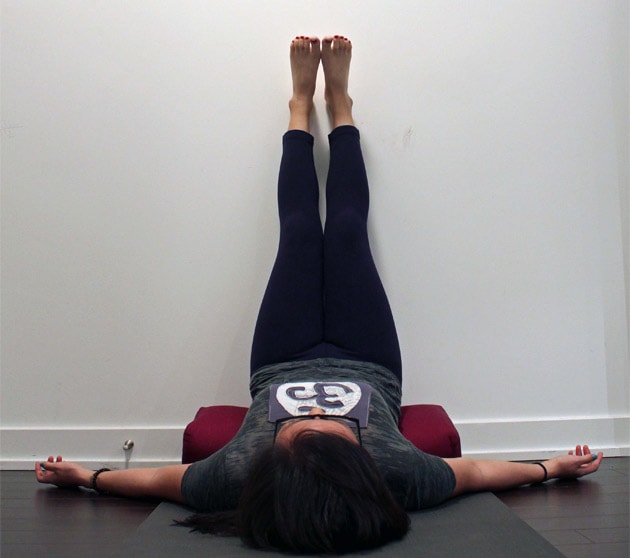
- Once you feel comfortable, allow your arms to fall open, palms facing up toward the ceiling. Soften your shoulderblades down and let your body be completely supported by the earth. Feel the femurs (thigh bones) drop more deeply into the hip sockets. Let the breath be natural and soft.
- Remain here anywhere from 3-15 minutes (or longer!). To come out of the pose, gently bend your knees as much as you need to press the soles of your feet into the wall, lift your hips up and off of your support, then roll over onto your right side. Whenever you feel ready, press yourself up to sit.
Tips:
- In any restorative pose, remember that comfort is your first priority, and that there should be no sensation of tension or activity.
- If it feels too challenging to hold the pose with straight legs for an extended period of time, using a strap to bind the legs together around the calves or thighs can provided an added sense of comfort and stability.
- If a bolster or folded blankets aren’t available, a block or rolled up yoga mat can also work. A belt or even a tie can work in lieu of a strap. Remember that makeshift props are always available!
- For tighter hamstrings, using a chair instead of putting the legs vertically up a wall is a nice alternative. Turn the seat of the chair to face towards you and place your calves on the chair seat with enough elevation under the hips to find the chair seat comfortably.
- An eye pillow is like the cherry on top of this pose, because it encourages your forehead (frontalis muscle) to relax. Again, if an eye pillow isn’t available, a folded towel works well.